Sawing case angles is easier, but a bit more work, because you’ll need 16 pieces in total: 4 for the bottom edges of your flight case, 4 for the top, another 4 for the sides on the bottom and 4 for the sides on the top.

You don’t have to mitre the case angles, you can just saw them straight. You don’t need to have them right up to the corners either, you can make them 3 cm shorter on every corner if you’re working with the 30 x 30 mm flight case angles of flightcase-brico.com. The ball corners we’ll fit later will cover those 3 cm anyway. You can make the case angles on the sides touch the lid locations, but make sure that the lid locations stay nicely over the edge and that you don’t accidentally move them with your case angles. It may be useful to knock the lid locations in place with a soft rubber hammer.
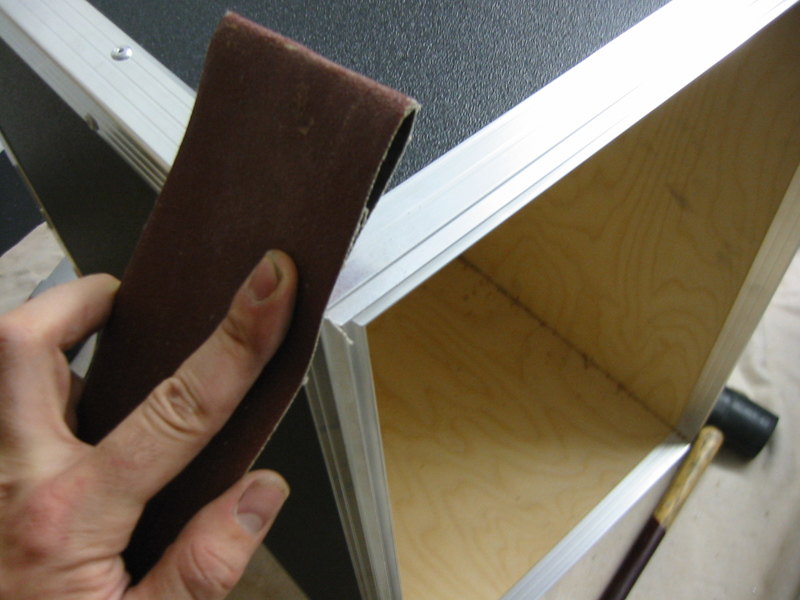
We’re going to fix the case angles straightaway. But before we can do this, we have to see if it’s necessary to slant the edges of your wooden case a little with sandpaper or a file, so the case angles will fit nice and snugly over the edge. We’ll use rivets to fix the case angles. You can choose how many, but the general rule is that there shouldn’t be more than 15 cm in between rivets. So maybe it’s best to measure and mark the spots for the rivets with a pencil on every piece of case angle. You don’t have to put rivets in the spots where we’re going to put the ball corners or the corner braces.
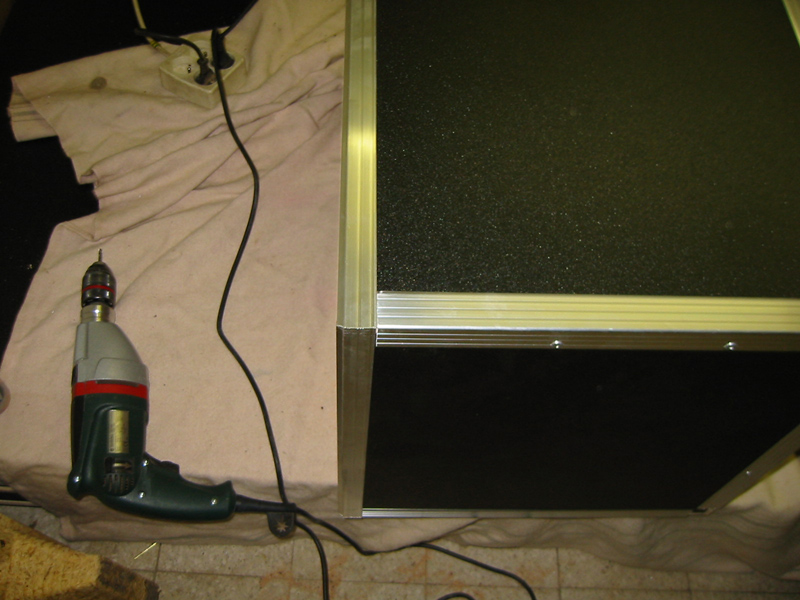
First drill the holes for the rivets with an aluminium-wood drill (the drill bits in the flightcase-brico.com web shop are ideal for this). Drill through the aluminium and all through the wood. The case angles usually have three grooves on both sides. Usually the rivets are put into the third groove (the groove furthest away from the case edge).

You can put the rivets in with a hand riveter or automatically with a rivet gun (with a compressor). The first option is of course the cheapest, and manageable for DIYers who don’t build flight cases all the time. Do not underestimate the force you have to use with hand riveters though, especially with the cheaper ones. Cheap riveters are sometimes available in DIY shops, but they often break very quickly. The more expensive kind are a better buy if you’re planning to make several cases. Flightcase-brico.com has a professional quality model.
Also read:
Which rivets do you need (overview table)?
Riveting case angle and casemaker profiles
We’ll be using rivets of 4 mm in diameter and 12.5 mm long to fix the case angles. The drill bits in the web shop are perfect for this diameter as well. You’re welcome to fix all 16 of the case angles already, but make sure you don’t move the lid locations, as they’re not fixed in place yet.
To fix the lid locations, we’ll be putting the large corner braces over them, while also partly overlapping with the case angles on the sides. Because the inside corners of the braces are often a bit rounded, it’s best to round the corners of the lid locations a bit with sandpaper too. That way the corner braces will nicely fit over them. You can drill all the way through the holes in the corner brace that fit over the case angle and use rivets of 12.5 mm long. For the holes in the corner brace that fit over the lid location, drill through the outside of the aluminium lid location and through the wood, but not through the inside of the lid location. This way it’ll stay nicely intact on the inside. Use the short rivets (9.5 mm long) to fix.
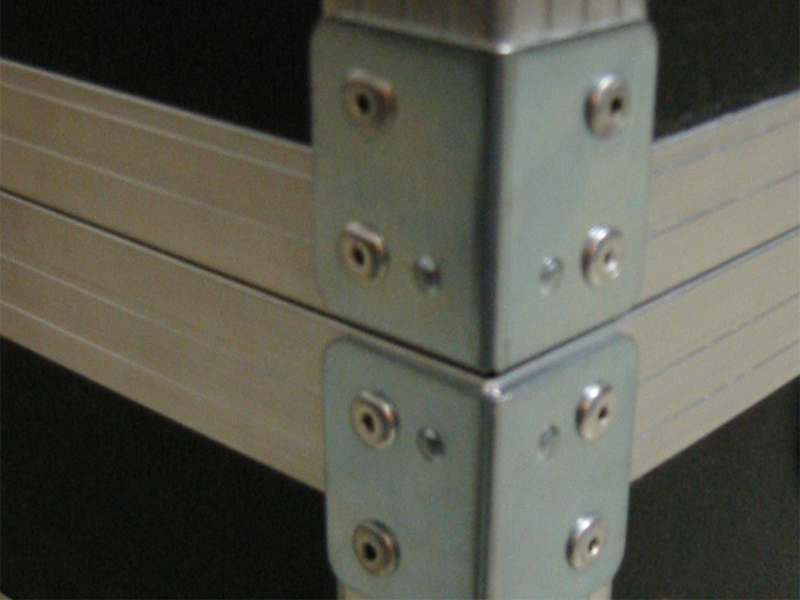
As a general rule, you could say: always use the long rivets of 12.5 mm, unless for fixing the lid locations, then use the short ones of 9.5 mm.
Which rivets do you need for your flight case and how many?
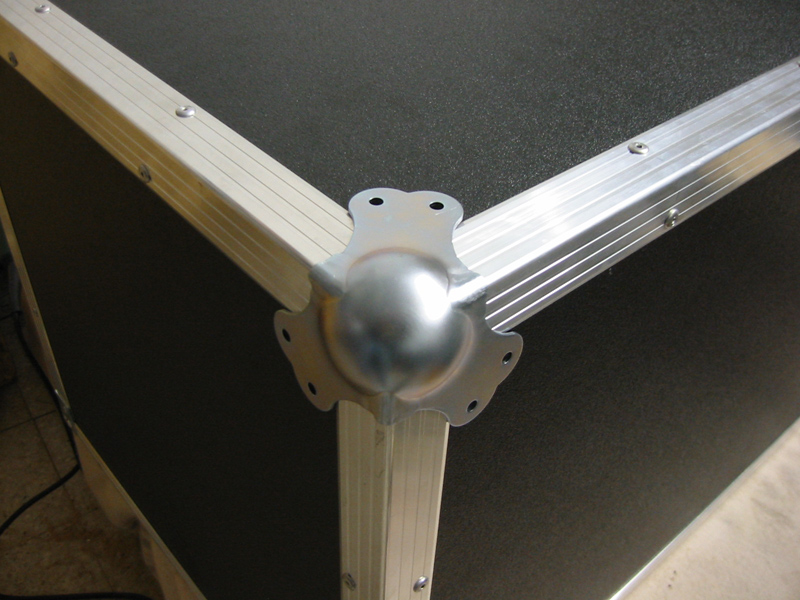
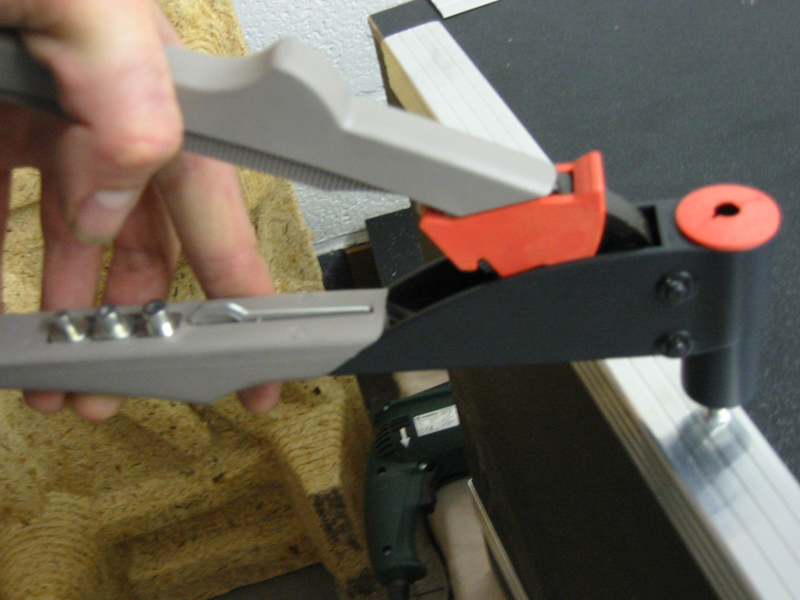
Now we’ve only got the ball corners left to deal with. Because I’m going to build two identical flight cases, I’d like them to fit on top of each other too. So I’m going to use four stackable corners on one side of the flight case. Usually I hold the ball corner with one hand and make sure I position it evenly, nicely fitting over the case angles. The legs will often not touch the wood, but you mainly have to make sure that you press the ball corner very firmly with one hand, so that the distance between the legs and the wood is a bit the same for all three legs.
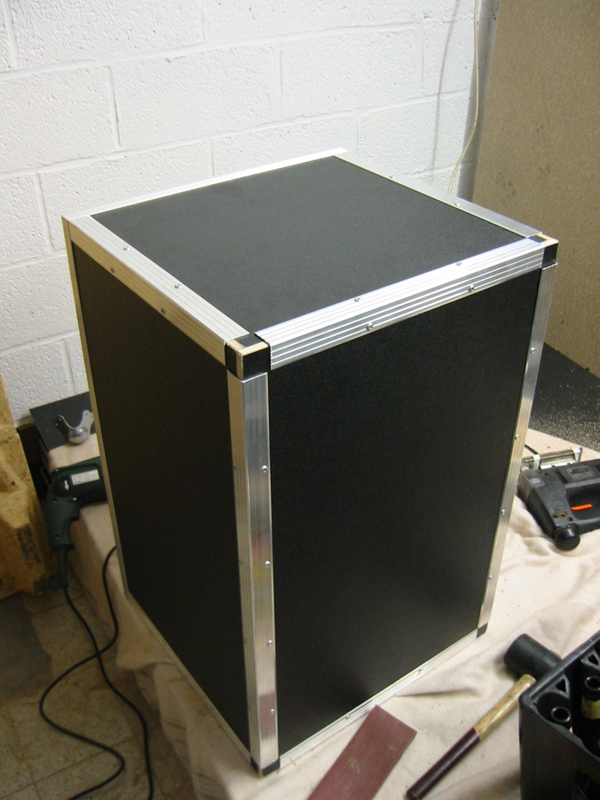
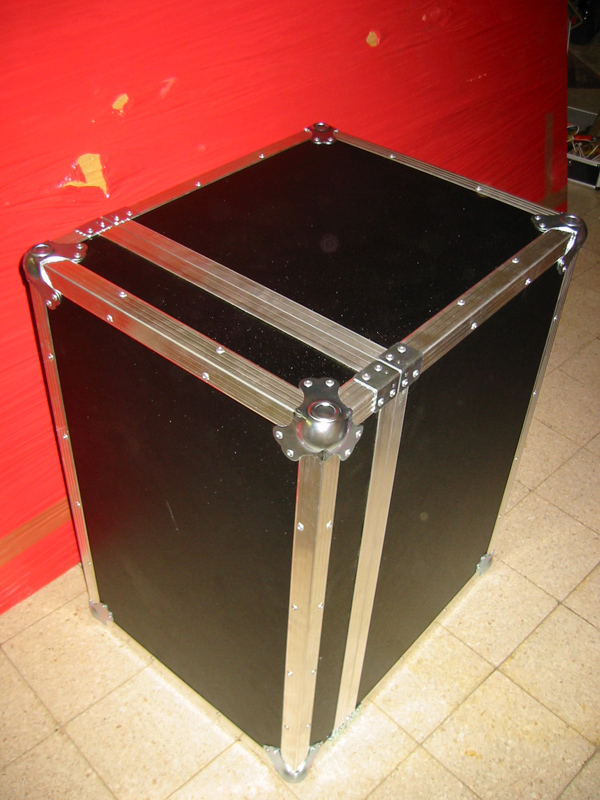
Then drill the six holes at once with your other hand, but make sure the ball corner doesn't move while you’re doing this. Fix the corner with rivets and we’re another step closer to the end. You’ll notice the rivets pulling the ball corner legs towards the wood. See the picture on the left for the intermediate result. Your unassuming wooden box has started to look like a real flight case now, hasn’t it?
To the next step => Step 5: butterfly latches, hinges and handles