We have already given you a general explanation of how rivets work. Below we provide some concrete use cases for securing simple case angle profiles or double casemaker profiles when building your own custom flight case. In this article:
Example 1 - Wood, single case angle profile and short rivets (LT)
Example 2 - Wood, single case angle profile and long rivets (HD)
Example 3 - Wood, double casemaker profile and short rivets (LT)
Example 4 - Wood, double casemaker profile and long rivets (HD)
Example 5 - Plastic, double casemaker profile and short rivets (LT)
Example 6 - Plastic, double casemaker profile and long rivets (HD)
Explanation about LT (Light) and HD (Heavy Duty)
Example 1 - Wood, single case angle profile and short rivets (LT)
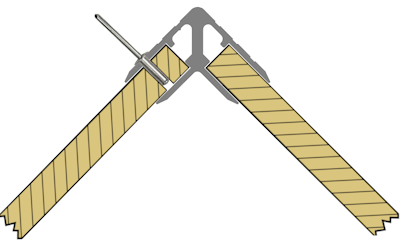
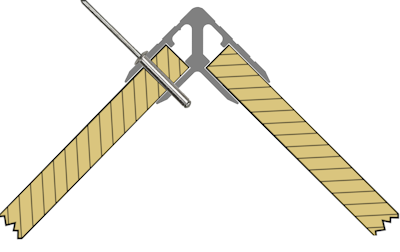
In this example we place an aluminum case angle profile on a wooden flight case. For example, consider a flight case made of birch plywood of 10 mm. We could use 4.0mm (diameter) x 12.5mm (length) rivets. You can see that the grip length is certainly not sufficient to also be able to use part 2 of the rivet's operation.
It is impossible for the rivet to grab hold "behind" the sheet material. You can see this visually in the sketches below, but you can also calculate it. The total thickness of the material to be bridged is 10 mm (wood) + 1.5 mm (angle profile) = 11.5 mm. If you look at the specifications of the 4.0mm x 12.5mm rivet you will see that it has a grip length of 4mm to 9mm. That is therefore not sufficient to bridge 11.5 mm.
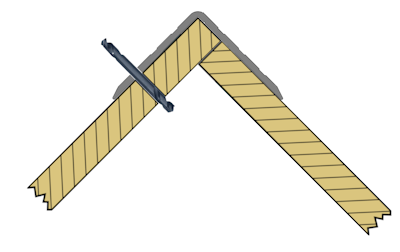
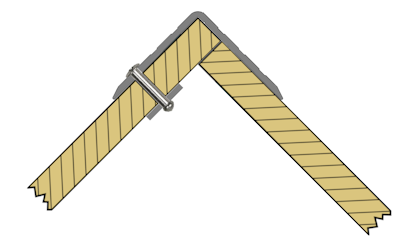
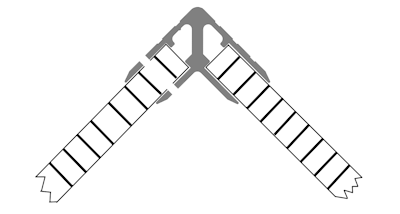
| Wooden flight case with case angle profile: |
|
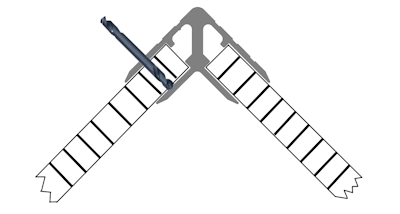
|
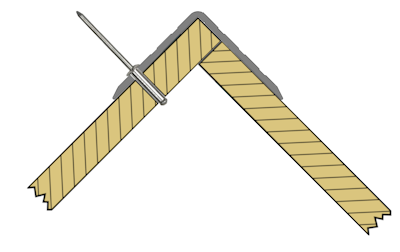
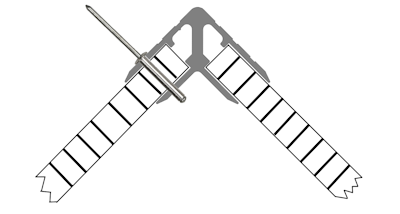
| Drilling through aluminum profile and through wood: |
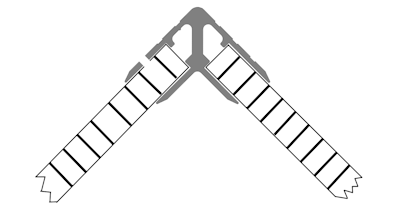
 |
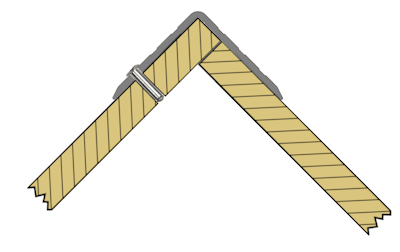
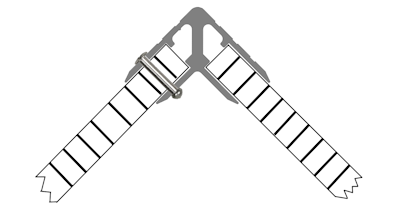
| Hole drilled: |
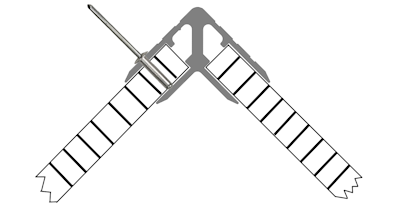
 |
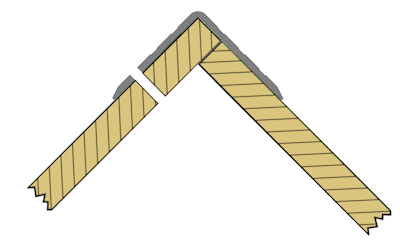
| Insert rivet: |
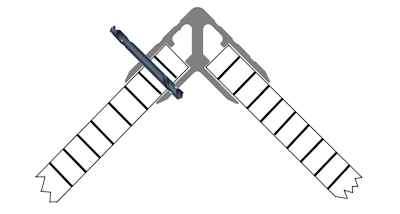
 |
| Rivet placed: |
 |

Do you want it a little stronger? Or do you just think a larger diameter rivet looks a little "cooler"? Then you can also apply this same principle with rivets of a larger diameter. In concrete terms, you can also use rivets of 4.8 mm x 10.5 mm or 4.8 mm x 15 mm. The operation remains the same as in the example above.
Example 2 - Wood, single case angle profile and long rivets (HD)
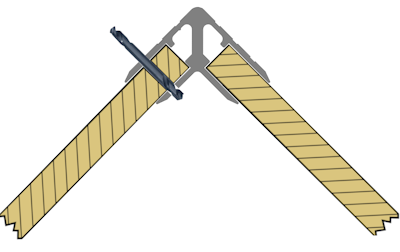
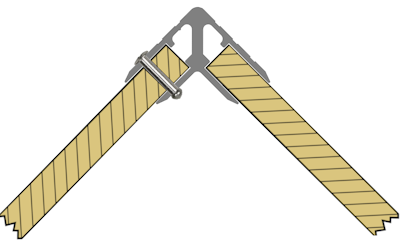
And if all that is not strong enough - but believe me, the above method will almost always suffice! - then you can opt for even longer rivets. Rivets that are also secured on the inside. Rivets with a sufficient grip length.
It is best to go "all the way" immediately and also provide a reinforcement ring (washer) along the inside. This ensures that the rivet has something very sturdy to grab onto behind it.
What grip length do we need? Well, the corner profile is 1.5 mm thick. The flight case wood is 10 mm thick. A washer is usually 1 mm thick. So a total of 12.5 mm. So we are looking for a rivet for wood with a grip length of at least 12.5 mm. We then end up with rivets of 4.8 mm x 19.5 mm.
| Wooden flight case with case angle profile: |
 |
| Drilling through aluminum profile and through wood: |
 |
| Hole drilled: |
 |
| Insert rivet and place washer: |
 |
| Rivet placed: |
 |
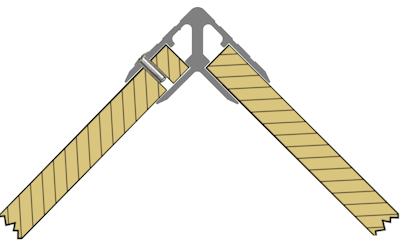
Example 3 - Wood, double casemaker profile and short rivets (LT)
Ready for a third example? We now work with 10 mm casemaker profile and 10 mm birch plywood sheet material. The casemaker profile consists of an outer and an inner part, each 1.5 mm thick.
Since we are not going to drill through the inner part, the length of the rivet should not be more than 10 mm + 1.5 mm = 11.5 mm. So here we choose rivets for wood of 4.0 mm x 9.5 mm.
| Casemaker extrusion and wooden flight case panels: |
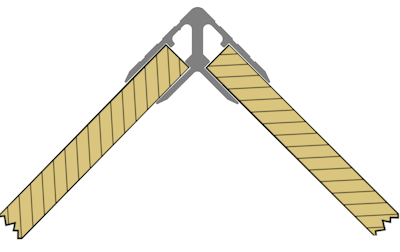 |
| Drilling, but not completely penetrating: |
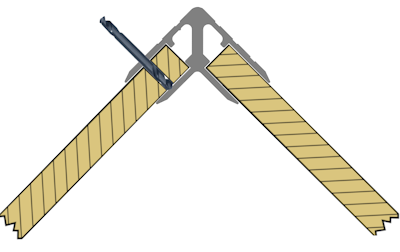 |
| Hole drilled: |
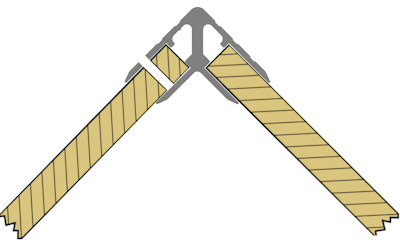 |
| Insert rivet: |
 |
| Rivet placed: |
 |
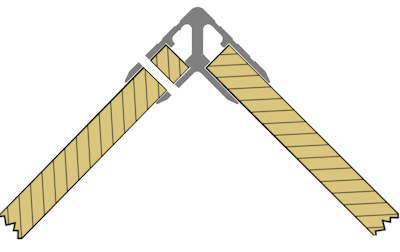
Example 4 - Wood, double casemaker profile and long rivets (HD)
Of course it can be even stronger! If we were to drill completely through in the example above, we can choose a rivet with a sufficient grip length so that it can also be secured on the inside. We then have to bridge 1.5 mm + 10 mm + 1.5 mm. A rivet for wood with a grip length of 13 mm. That brings us to the rivet for wood measuring 4.8 mm x 19.5 mm.
| Casemaker extrusion and wooden flight case panels: |
 |
| Drilling completely through: |
 |
| Hole drilled: |
 |
| Insert rivet: |
 |
| Rivet placed: |
 |
Example 5 - Plastic, double casemaker profile and short rivets (LT)
The biggest difference between plastic flight case sheet material and wooden flight case material is the fact that plastic panels are largely hollow on the inside. So a different approach is also needed regarding rivets.
A second major difference is the fact that plastic is, as it were, softer (offers less resistance when tightening the rivet) than wood. That is why we at Flightcase-brico.com have other rivets on offer specifically for plastic sheet material.
A first option is to use short rivets, which do not clamp BEHIND the sheet material, but only IN the sheet material. In concrete terms, we use a rivet of 4.8 mm x 12 mm.
We only recommend this method for small and not too heavily loaded flight cases. For larger or heavier loads, it is best to look at example 6 later in this article. But for now the drawings for the current example 5:
| Casemaker extrusion and plastic flight case panels: |
 |
| Drilling, but not completely penetrating: |
 |
| Hole drilled: |
 |
| Insert rivet: |
 |
| Rivet placed: |
 |
Example 6 - Plastic, double casemaker profile and long rivets (HD)
As already mentioned, for plastic panels this is the most appropriate construction method for your flight case. In this example we use 10 mm double casemaker aluminum extrusions and 10 mm plastic flight case panels. We want to drill completely through and we want the rivet to grip the back of the inside of the flight case. So we need rivets with a grip length of at least 1.5 mm + 10 mm + 1.5 mm = 13 mm.
So we are looking for rivets for plastic panels in the Flightcase-brico.com range with a grip length of at least 13 mm. We arrive at this with the rivets of 4.8 mm x 18 mm or these of 4.8 mm x 21 mm.
By choosing rivets of the correct grip length, a "ball" will form at the back of the rivet and the rivet can therefore clamp everything properly.
| Casemaker extrusion and plastic flight case panels: |
 |
| Drilling completely through: |
 |
| Hole drilled: |
 |
| Insert rivet: |
 |
| Rivet placed: |
 |
Which rivets do you need (overview table) for the construction of your flight case?