Step-by-Step Assembly Instructions - Building a 19-inch rack case
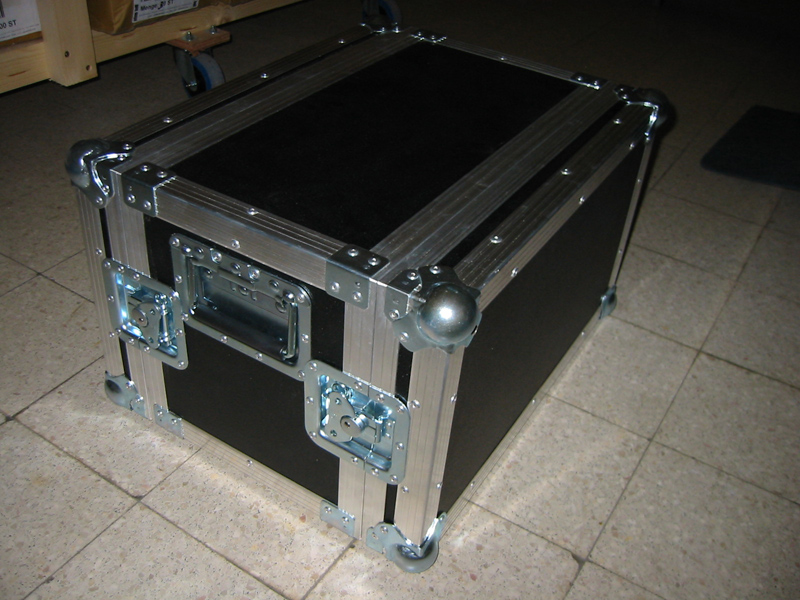
Building a 19-inch rack case is actually the same as building a flight case like the one I showed you in the general step-by-step instructions. It’s probably best to read through these first if you haven’t done that yet. These photos already show you the 19-inch flight case we’re going to make.

Just like in the flightcase construction tutorial, we’re going to start with building a wooden ‘box’, then saw it in two and put on the lid locations, case angles, corner braces, ball corners, butterfly latches and the handles. Just everything as if you were building a normal flight case.
There are a few things very typical for 19-inch rack cases, though, which I’ll explain further in the tips below.
The design
For this flight case I need:
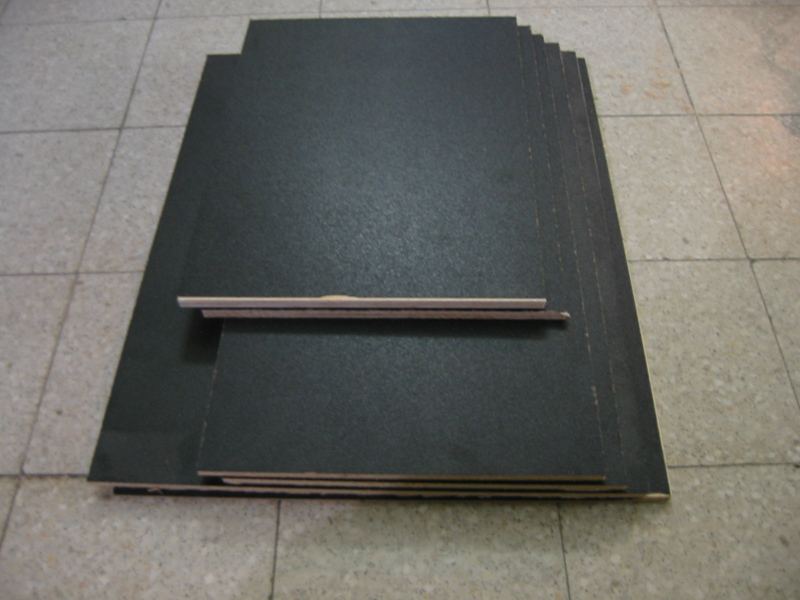
- flight case wood
- lid locations
- case angles
- 8 medium ball corners
- 8 large corner braces
- 8 small corner braces
- 4 medium butterfly latches
- 2 medium recessed handles
- 2 pièces de pieces of 6U rack strip
- 4 reinforcement washers
- bag of 8 cage nuts, 8 bolts and 8 washers to fix the 19-inch equipment in the rack strip
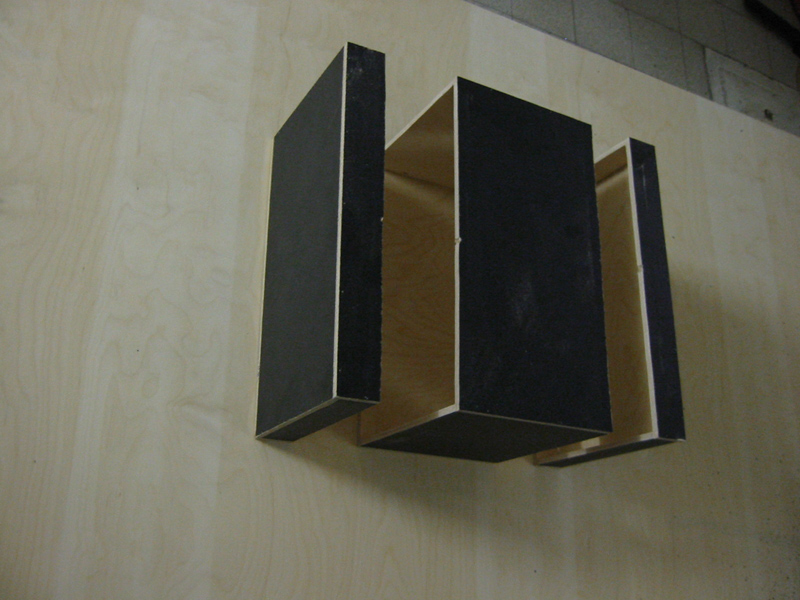
19-inch rack cases often come in a so-called ‘tunnel’ or ‘double-door’ version made up of three parts: a lid at the front, a lid at the back and the ‘case’ itself, open front and back, hence the name ‘tunnel’.
For certain specific purposes, some people prefer not to have a completely removable lid at the back, but only leave a small door in the flight case wood. Of course that’s a matter of personal preference, but it speaks for itself that a tunnel case is the most flexible solution, because you can still get to the back of all your equipment easily and that’s where all the connections are.
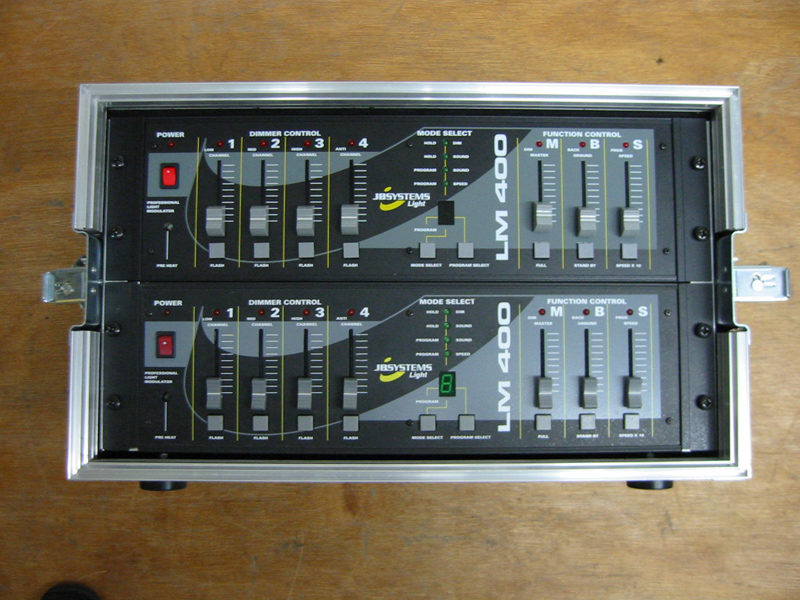
So here we’re opting for a tunnel flight case. I don’t need the tunnel itself to be very deep for my project, because the rack case I’ll be making will be used for 2 LM400 modules and they’re only 15 cm deep. So if I make the tunnel (excluding the lids) about 30 cm deep, I’ll have plenty of space left at the back to tuck some cables in for the connections.
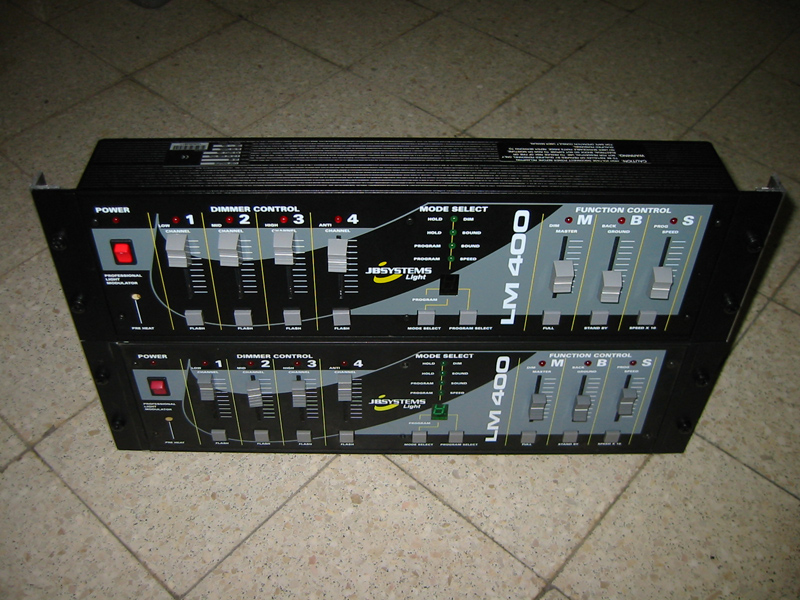
One LM400 module is 3U (rack units) high. So to fit in my two modules I need to account for 6U, or 6*44.45 mm = 266.70 mm = 26.67 cm.
As you can read in the article "What is a 19-inch rack?" the width of 19-inch equipment is 48.26 cm. And the height for 6U is 26.67 cm. So, generally speaking, I now have the minimum inside measurements of my rack case. However, it might be useful to allow for at least half a centimetre more, for the width and for the height. After all you’ll have to take the width of the lid locations into account too, as the ‘entrance’ to the tunnel will be a few mm smaller once you’ve put these on.
So that’s why I’m making the flight case’s inside 49 cm wide (you’re welcome to take this as a standard measurement for all 19-inch rack cases) and 28 cm high. This way I’ll have enough room left on both sides and I’ll still have a bit more than half a centimetre top and bottom. I prefer to have enough space above and below my equipment, because otherwise the equipment sits too close to the flight case wood and this is not ideal when it comes to getting rid of excess heat.
Now we’re talking about getting rid of excess heat anyway: imagine you want to make a 19-inch rack case for amplifiers. That’ll be very different. Power amplifiers typically use a lot of electricity and produce much more heat than special effects equipment, for example, so it may be necessary to deal with this issue by fitting thing like extra ventilators. People often advise against putting several amplifiers on top of one another in a 19-inch rack case, unless you leave a few U space between them. You can find more info on this in the manual of your amplifier.
Building the rack case
So I had already calculated the inside measurements for my rack case: it’s going to be 49 cm wide and 28 cm high. The flight case wood from the web shop is 1 cm thick, so I’m going to build a wooden box of 51 cm (wide) x 30 cm (high) x 38 cm (deep).
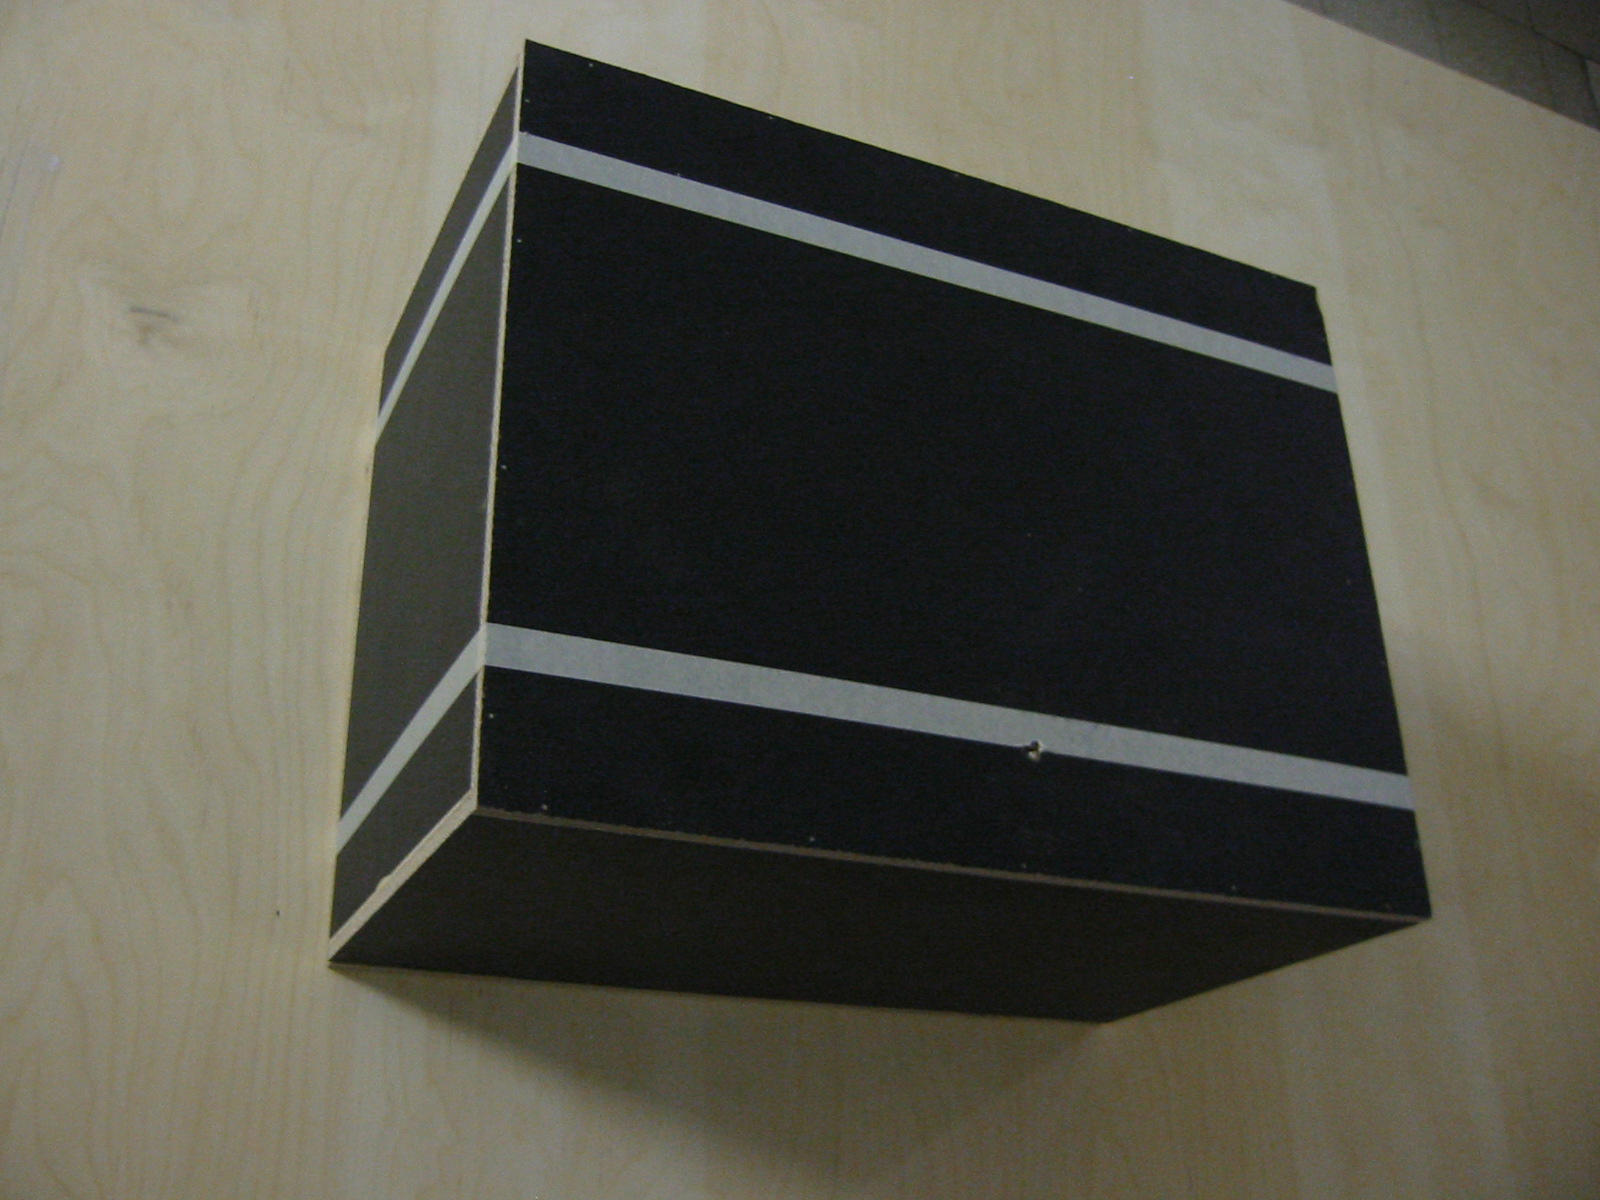
Once I’ve glued and nailed my closed wooden box together, I saw the two lids off with a fretsaw. Please see the Step-by-step instructions - Step 2: wooden box for how to do this. I’m making my lid 6 cm thick. Now I’m finished with the sawing, I’ve got three parts: one of 6 cm, one of 26 cm and another one of 6 cm (38 cm altogether). The flight case itself is going to be about 40 cm deep (on the outside) once I’ve put the lid locations on, because lid and lid location together are always about 1 cm more. This case has got two lids, so that makes 2 cm extra depth.
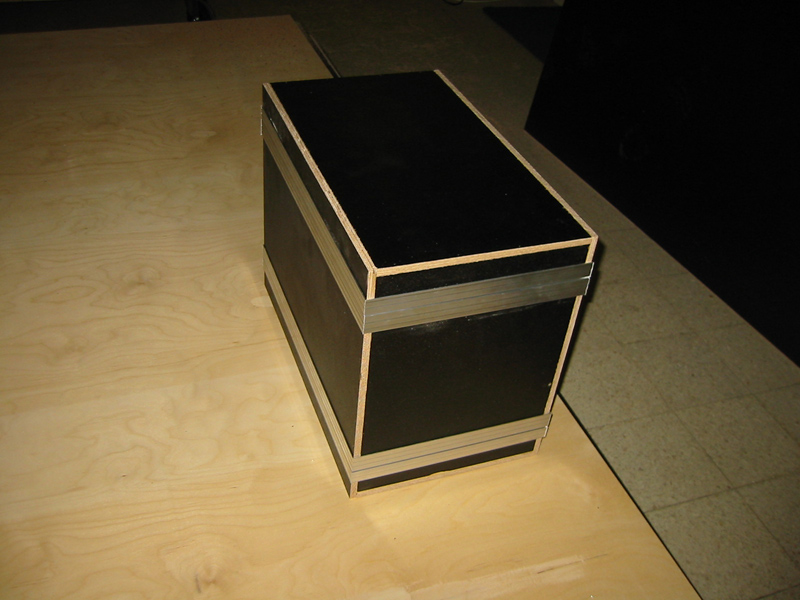
When you’re deciding how deep your flight case should be, you generally don’t only have to take the depth of the equipment into account which you’re going to put into it. You have to make sure you’ll have enough space for the butterfly latches and the handles as well. On this case, you can see that the butterfly latches and the handle overlap a little, so this is really the shallowest a rack case can be.
In practice it’s better to make it always more than deep enough, though. Most rack cases have a ‘useful’ depth of between 30 and 50 cm for the tunnel itself, which means the total depth of the case (including the lids) is roughly between 40 and 60 cm. This seems a lot but it’s not really over the top. You should also take into account that, if you build your rack case well, it’ll probably last longer than the equipment you’re going to put in it now. So if you’re rack is deep enough, you can still use it later for other (and maybe deeper) equipment.

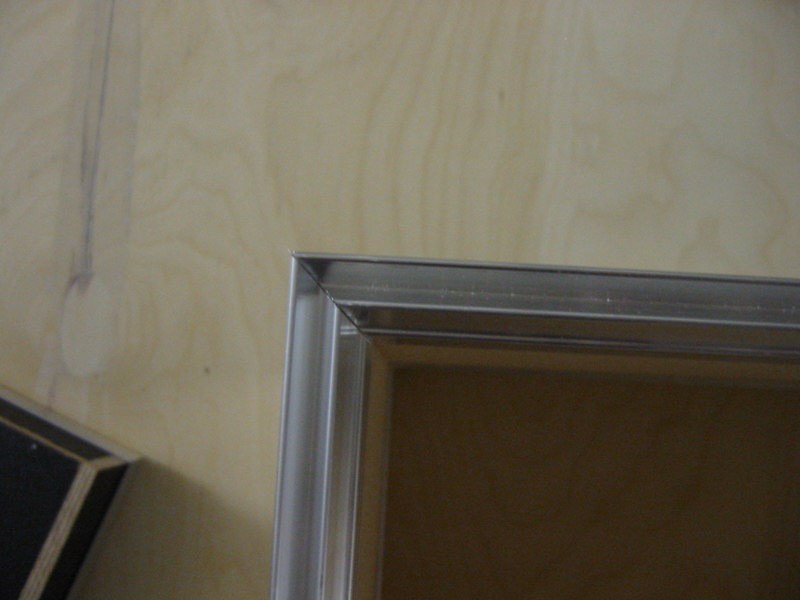
Putting the lid locations on is the same as for a normal flight case, but it’s best to have each lid fit on the front and back. To make sure this is the case, swap the front and back lids around, turn them and see whether they really do fit in all possible directions while you’re mitring the pieces of lid location (you need 16 of them in total). There’s nothing more annoying than two lids that look the same, but one of which only fits on the front and one only on the back.
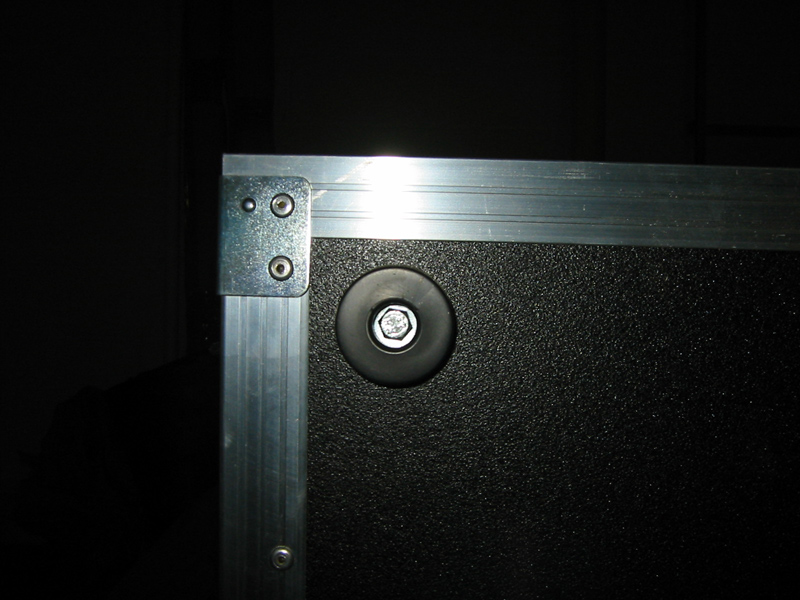
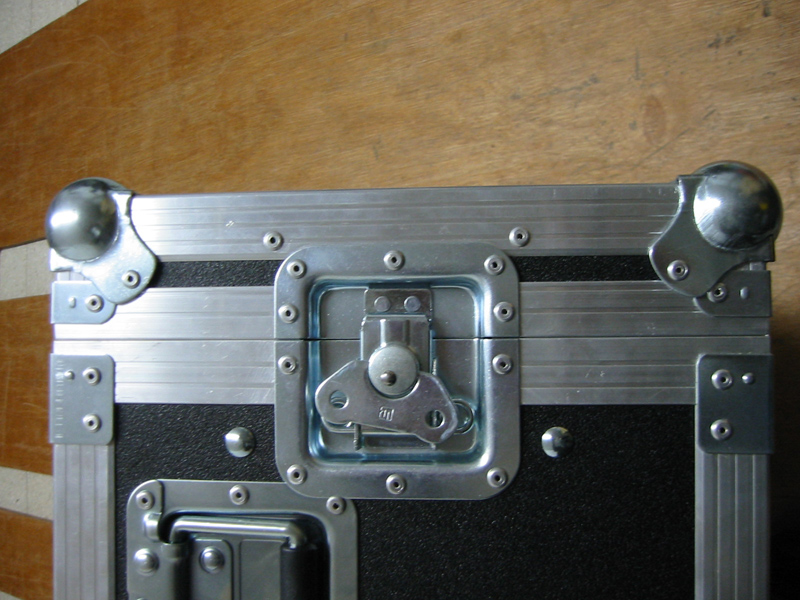
Then I put on the corner braces and case angles. As you can see on this picture, I’ve used 8 large corner braces on the tunnel itself and 8 small corner braces on the lids for this particular project. Actually it would have been even better if I had used large corner braces for the lids too. A corner brace has four fixing holes, but if the lid is too narrow, it’s possible for two of those four holes to end up under the legs of the ball corner and you won’t have to put any rivets in those two holes. Don’t worry about this, it won’t have any nasty consequences. The disadvantage of small corner braces is that you have to put them a little further away from the edge of the lid location if you want your corner brace to fit over the case angle a bit as well. I’ve put the large corner braces on also slightly further away from the edge of the lid location to make the whole thing look balanced. If I had been working with large corner braces all the way, I would have put them all a bit closer to the edge of the lid location and that would have looked even more professional.
There we are. Now only the case angles, ball corners and handles. You know how that goes. For this case I’ve chosen medium ball corners, because they take up less space than the large ones. The legs on large ball corners are longer than those on the medium ones and for a 19-inch rack case, we usually want the lid to be as narrow as possible anyway. This is also why we usually work with medium butterfly latches on cases like these.
When you’re fitting the butterfly latches, you have to be careful again that everything fits in all possible directions. For this case, I’m using 4 medium butterfly latches. Start with putting in one complete butterfly latch at the front and make sure to put it perfectly in the middle. Then turn the lid upside down and put in the two halves of the second butterfly latch, each half across the half that’s already there. This way, you can be sure the lid doesn't have a right side up: it’ll fit in both directions.
Now place the lid (with two halves of a butterfly latch) on the back of your tunnel and put the other lid on the front. To be really safe, you can press the three parts of your case firmly together with one or two lashing straps. Put in the four parts of the two remaining butterfly latches. Now you can be certain that both lids will fit on the front and the back.
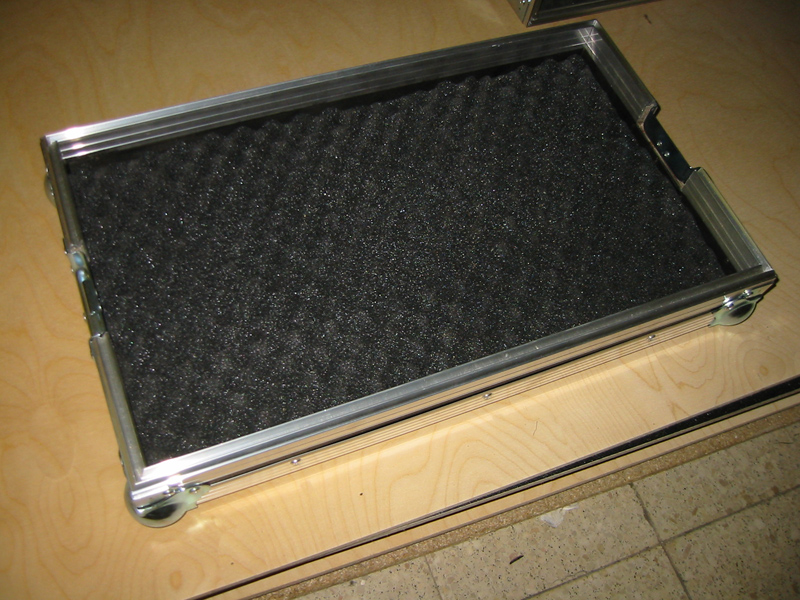
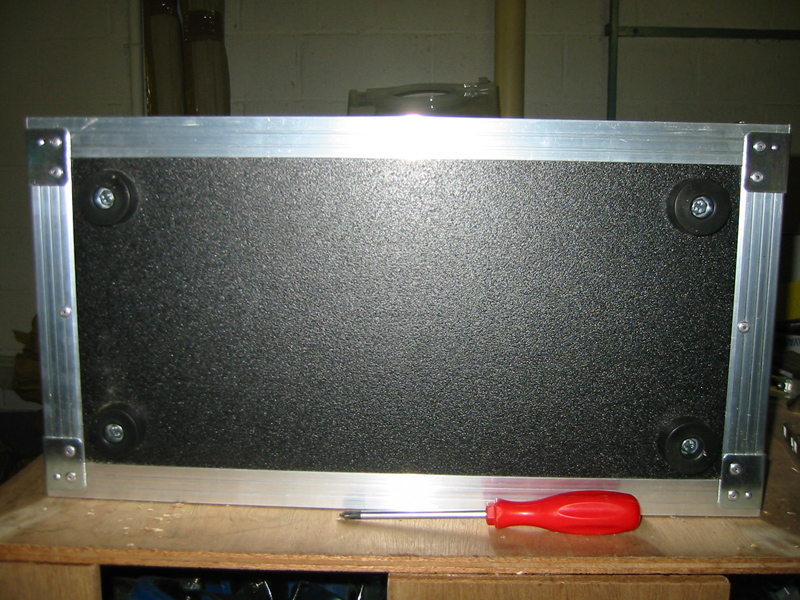
There we are. My case is ready on the outside. For the inside, I'm going to paint the bare wood black first. I’m going to stick some soft eggbox foam on the inside of the lid, because it’ll look more professional, I find. I’m also going to put four rubber feet under the middle part. The advantage of the feet from the flightcase-brico.com web shop is that they’re high enough for the flight case not to rest on its ball corners, which makes putting the lids on and taking them off a lot easier.
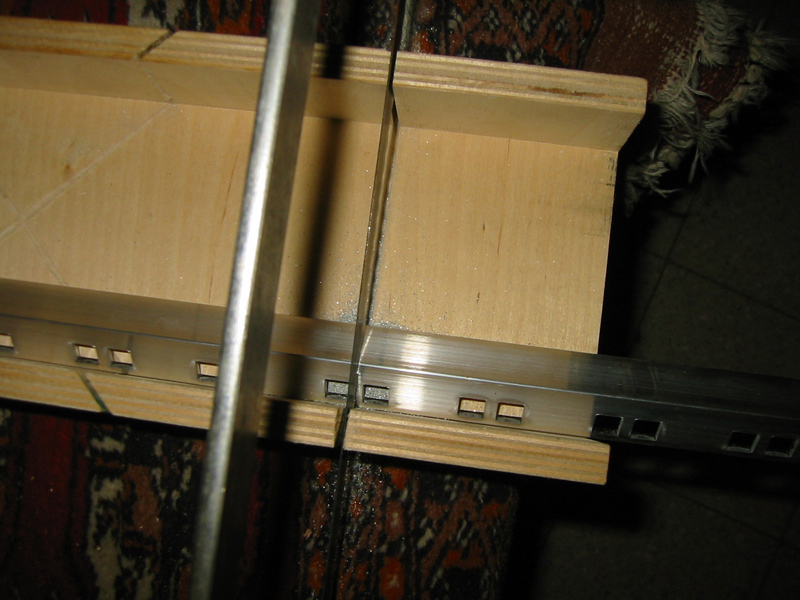
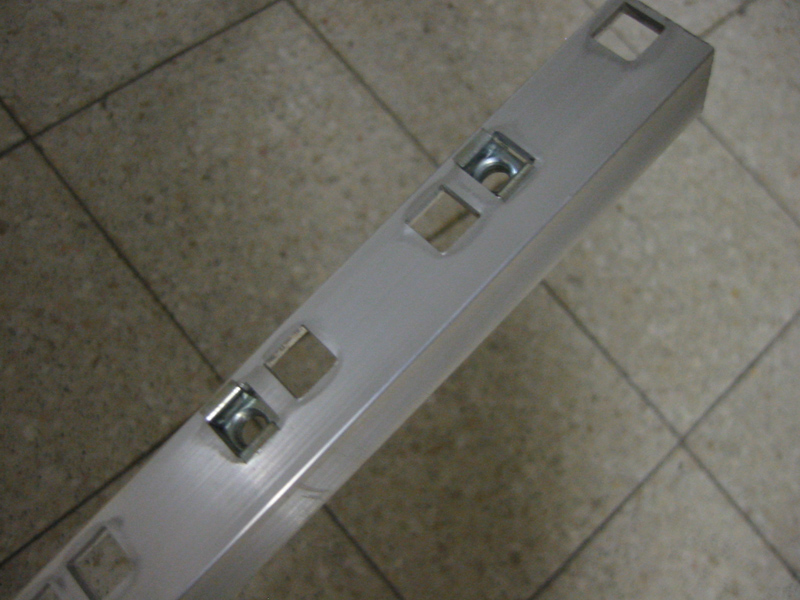
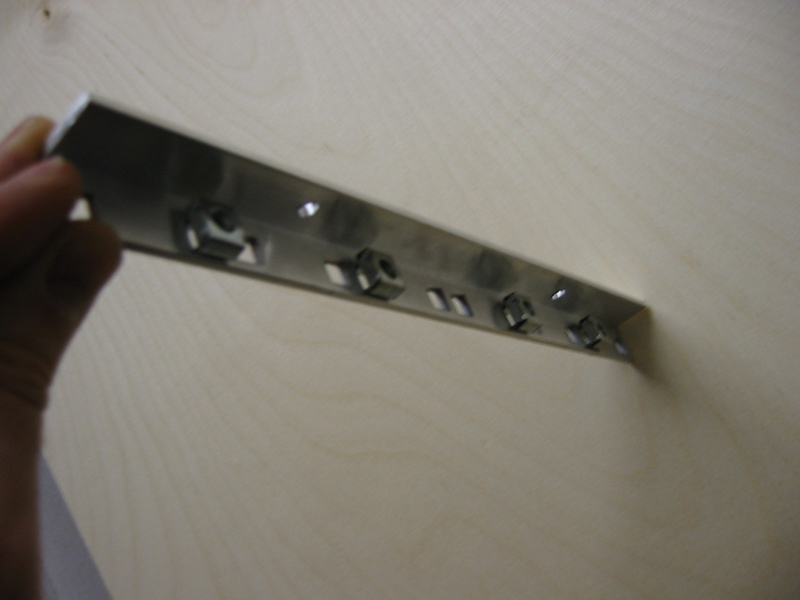
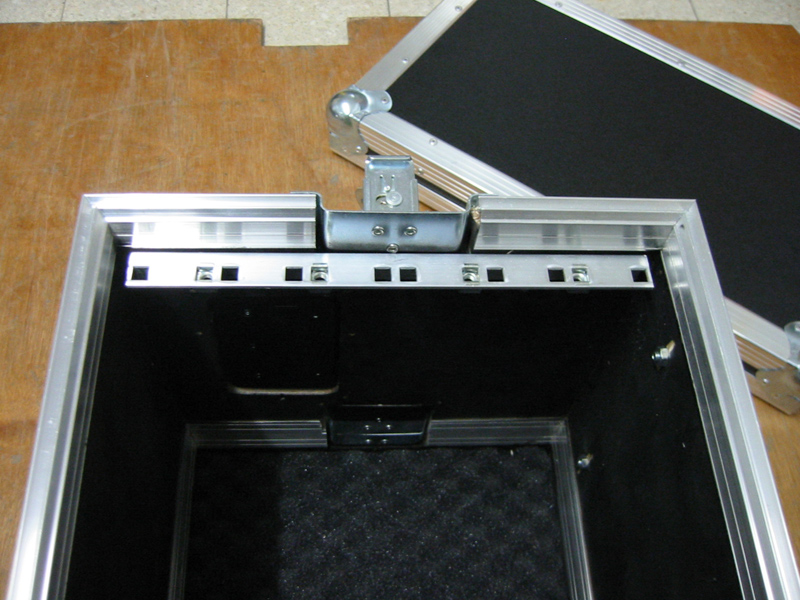
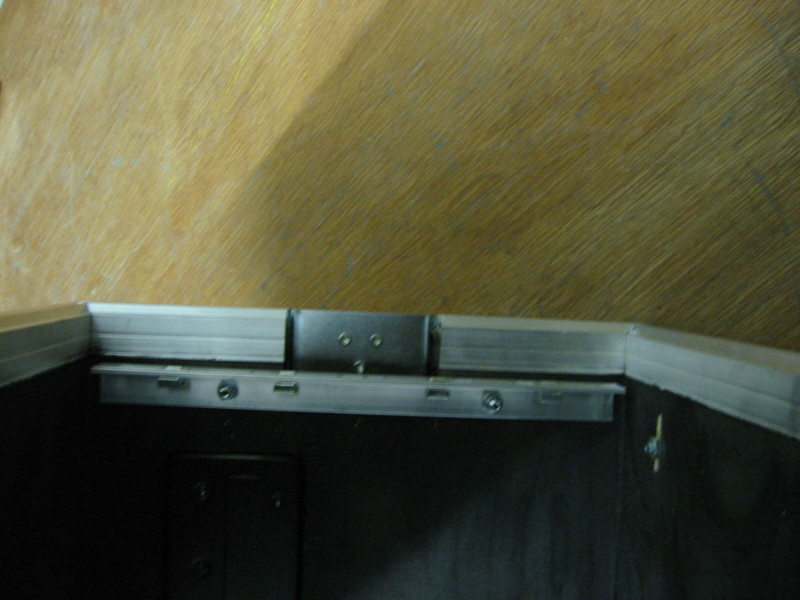
So now I’ve only got the 19-inch rack strip to put in. I’m going to saw the aluminium strips to 6U first and then put in the 8 cage nuts.
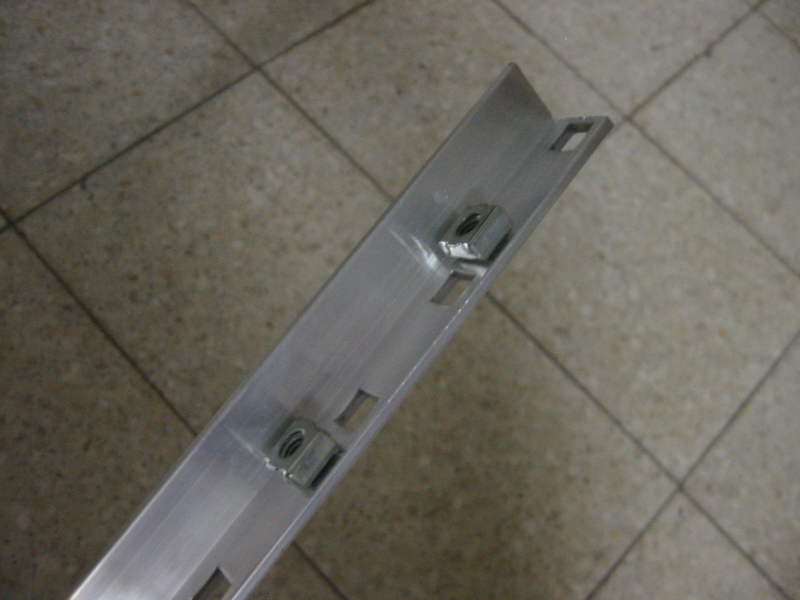
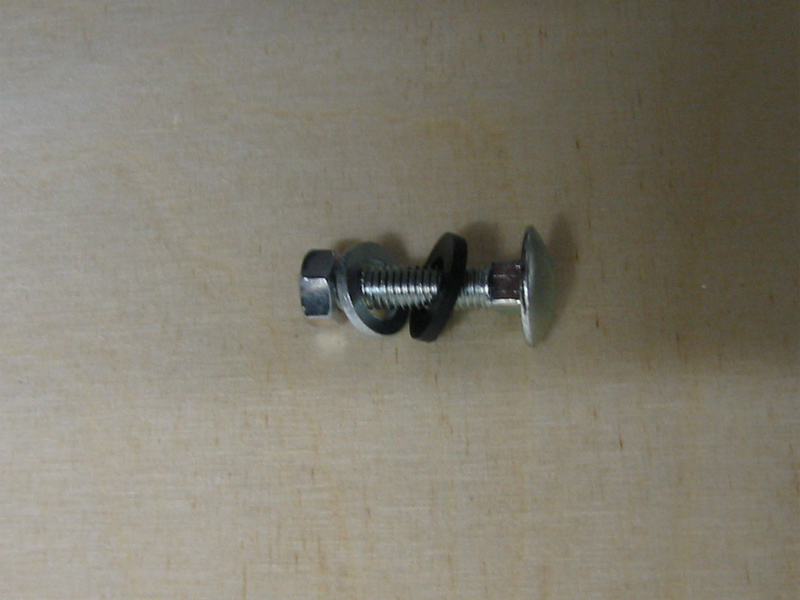
I’m using 4 M5 nuts and bolts to fix. M5 means the diameter of the bolts is 5 mm. The bolts I’m using are 2 cm long with a flat head and can be found in any DIY shop. To fix, drill 2 holes with a 5mm drill bit in both pieces of rack strip and all through the wood. Then put in the bolts from the outside through the wood and put on one or two washers (depending on the excess space you left in your rack case width-wise, for my case this is 1.5 mm left and right). Then slide on the rack strip, put on another washer and nut.
Now fix your equipment with 8 black bolts and 8 black washers and there you have it.

Finally, I would add that it is becoming more difficult for smaller 19-inch cases to use the medium butterfly lock. For very narrow 19 inch rack flight cases (for example 2U) there is therefore the Narrow built-in butterfly lock.
Any questions? Contact us!