Tutorial: General flight case assembly instructions
Step 1: before you start
Step 4: case angles, corner braces and ball corners
Step 5: butterfly latches, hinges and handles
Step-by-step instructions - Step 1: before you start
OK, so you decided to make your own tailored flight case. But what parts and tools do you need for this exactly, and how should you start on it? These step-by-step instructions will help you to successfully build your very own flight case.
Be careful, though! These are only example instructions, so they’re not the only correct way to build a case. There are a thousand and one other ways to approach this, so I’m definitely not going to say this is the only or the best way to do it. Certain things you can do in a different order. Sometimes the best way to approach things depends on the situation you’re in. But with the instructions below, I’ve tried to give you a good idea of how you could go about building your flight case if you’ve never put one together before.
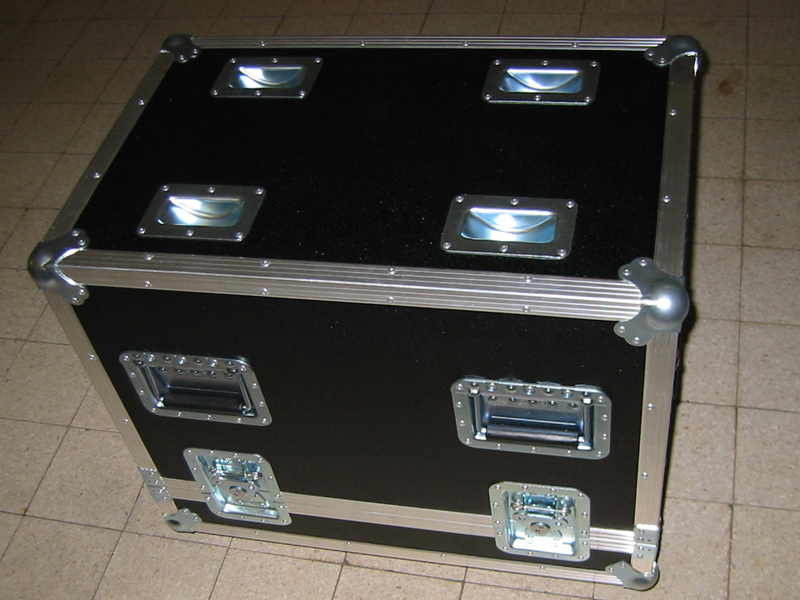
OK, so you’ve got a clear image in your mind as to how you’d like your case to be. Imagine you want to build a flight case of 40 x 50 x 65.5 cm for a loudspeaker weighing 40 kg. You can see the result we want to get to in the end up here.
First of all, you can pay a visit to the DIY shop and buy the things you need: wood, hinges, latches, wheels, etc. Now, if you think you can just take a quick trip to the DIY shop on the corner and find all the material you need to build a real flight case, you won’t get very far.
You’ll soon notice that you’ll only be able to build a tarted up ‘box’ at best with the parts you can buy in your average DIY shop, while the ones you can find in the web shop on here at flightcase-brico.com will make you a real professional flight case.
But you decided only to be satisfied with the real stuff and you want to build a real flight case, able to handle all the dangers of the road. This means you’ll need to make a few choices first.
Choosing the wood
First up: will you work with real flight case wood (with a hard, black protective layer) or will you be OK with just normal wood that you’ll spray or paint black yourself? Spraying will probably end up being a bit cheaper in most cases (although this depends on the kind of paint you choose), but real flight case wood is clearly much better in terms of scratch and shock resistance. And it’s also the only option if you want a flight case that looks really professional.
It’s up to you, of course. I’ve seen very nice self-sprayed flight cases (I know, I’m not talking in favour of my own case here), but if your flight case is regularly on the road, you may have to opt for real flight case wood anyway, as this’ll last you for many years.
If you choose normal wood, you’ll find that in any DIY shop without a problem. For example 10 mm plywood. Some shops don’t sell this, but have 9, 12 or 15 mm, for instance. What thickness you choose all depends on what your flight case is for, but most often 10 mm will be strong enough. Careful though: at the moment, flightcase-brico.com has lid locations of 10 mm or 13 mm. If your wood is 9 or 12 mm, you can deal with this problem by sticking something under the lid location on the inside, like a thin piece of cardboard.
I’ve chosen real flight case wood for my project. Plywood of 10 mm should definitely be strong enough for my 40kg loudspeaker.
Case angles or case makers
Then you have to choose whether you’re going to work with case angles or case makers. If you work with angles, you’ll make a wooden box first and then reinforce it by fitting aluminium case angles over the edges. If you work with case makers, you’ll slot the wood into the extrusions. The sides of the case won’t be fitted together, but indirectly attached to each other with the aid of case makers serving as the links between the wooden panels of your flight case.
Tools
Most things you need are everyday standard tools that average DIYers have at home or which they can go and borrow from friends, family or the neighbours if necessary.
- wood saw
- carpenter’s glue
- hammer
- sandpaper
- file
- hacksaw
- mitre box/-saw
- drill bit for aluminium and wood
- drill
- fretsaw
Flight case parts
Of course this depends in the first place on the type of case you’re after. In my case, I need:
- nails (2 cm)
- 8 corner braces
- 4 large, stackable ball corners
- 4 large butterfly latches, with spring
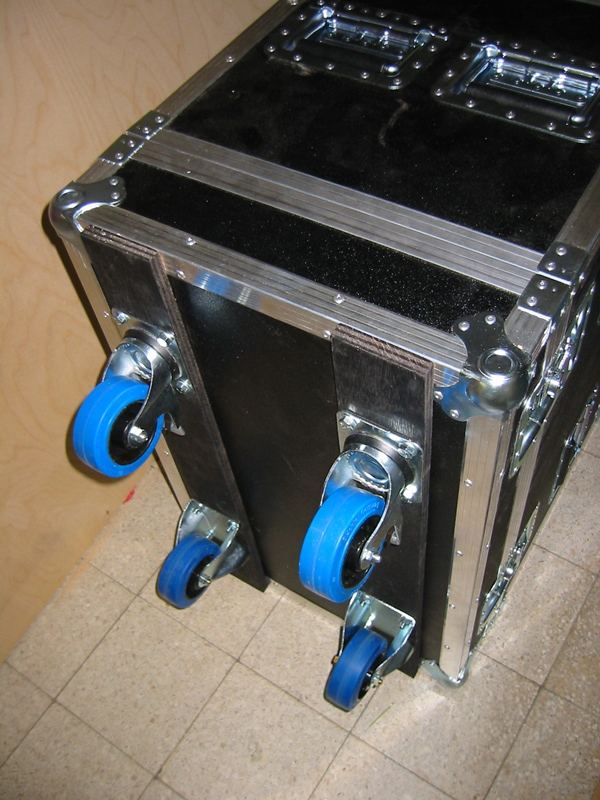
- thick plywood for the wheel panels
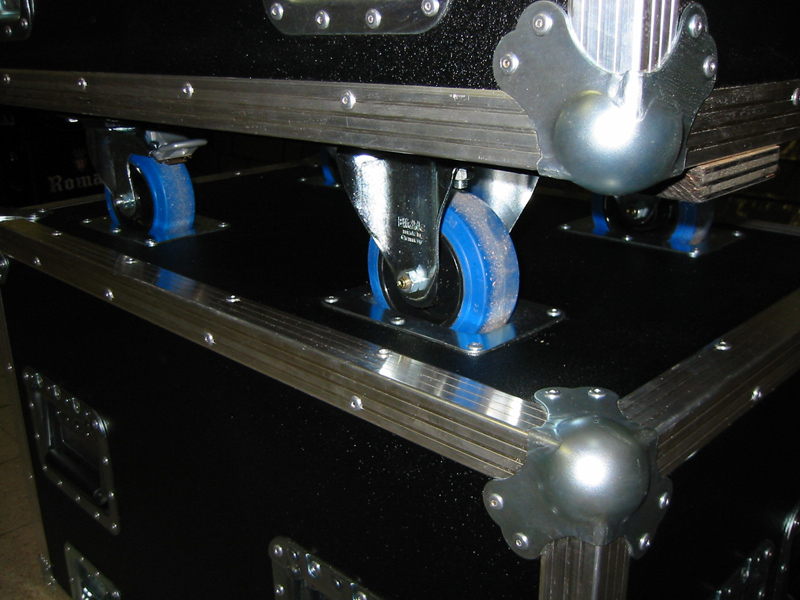
- 4 castors
- 4 castor dishes
- long and short rivets (lots)
To the next step => Step 2: wooden box