Why wheels?
There are a number of factors that play a part in deciding whether to fit wheels under a flight case or not. Lots of them of course depend on personal preference, but wheels will often be preferred for heavier cases, because they’ll make transport a lot easier. A flight case of 50 kg, for example, is very difficult to lift for one person, so wheels will offer a solution there.
Of course, you could also consider not putting wheels under your flight case(s) and just use a so-called ‘dolly’, a small panel or frame with 4 wheels under it to put multiple flight cases on to move them.
Putting wheels under a flight case definitely makes things easier, but don’t forget they also take up more room. If your means of transport is limited in terms of stacking space (and who doesn’t have this problem?), you also have to take into account the extra space the wheels will take up. The standard flight case castors in the flightcase-brico.com web shop are 10 cm in diameter, but including wheel panel and swivel mechanisms, you have to reckon with 15 cm extra height if you use these.
Then you can of course choose either fixed or swivel castors, with or without brake. Most people opt for swivel castors, but I personally prefer to combine two swivel castors with two fixed ones if I’m going to tip the flight case in the van. Then I put the fixed castors on the side where the case will touch the floor when it’s tipped. With swivel castors I’ve namely always had the problem that the wheels end up hanging upside down and that gives a bit of a bump at the moment you want to put the case on its wheels again. But of course this is just a matter of personal preference.
Where to put the wheels?
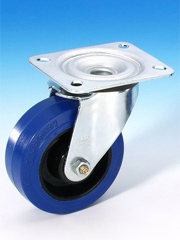
Once you have decided to put real, blue flight case castors under your case, you need to think about a few things. Firstly, the wheels aren’t usually put straight onto the case itself, but on a wheel panel. For an example, please see the Step-by-step instructions - Step 6: wheels.
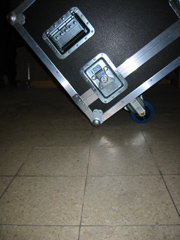
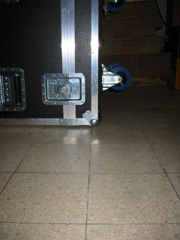
Secondly, you have to take your case’s stability into account. The further to the outside you fix the castors, the more stable your case will be. On the other hand, if you’re often transporting your case in the back of a van or truck, you’ll probably want to put it on its side most of the time (also termed “tipping”). If this is the case, it’s useful for the wheels not to be too far on the outside. So it’s actually a question of finding a compromise.
Fixing castors and wheel panels
Usually there are two wheel panels and four castors on one flight case. The wheel panels are cut to the same length or width as the case. I usually use 18mm plywood, though thinner is OK too, and I spray the panels black to match the case, once I've sawn them to size.
Why do we actually use wheel panels, I hear you ask? You could as well fix the castors straight onto the flight case, right? Well, the wheel panels make the case stronger and more stable. After all, the flight case wood is only 9 mm thick. But it’s also just a more practical way to go about things, because you don’t need to drill all the fixing holes for the bolts on your castors all through the flight case wood (and maybe even through the case angles as well).
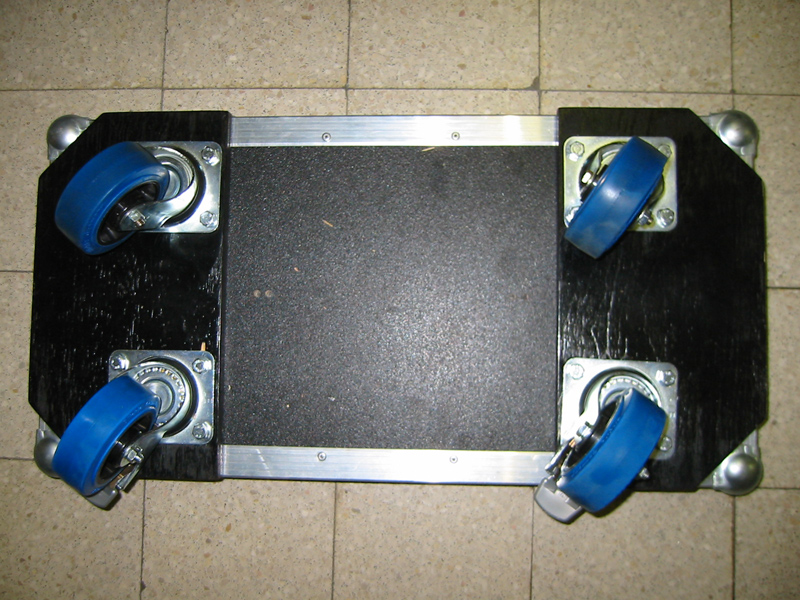
Personally I find it the easiest to put the wheel panels on not lengthways, but sideways. So I always make short wheel panels. If I’m working with 4 swivel castors, 2 of which are braked, I find it best to put the two braked castors both on one of the long sides. If you want to fix your case in place, it’ll stay there more easily with this set-up than if you were to put the 2 braked castors on one of the short sides.
To decide where to put the wheels exactly, you have to take into account three factors:
- the braking mechanism on the wheels has to be easily accessible with your foot
- the case must stay as stable as possible while moving
- tipping has to be easy
The first factor is definitely very important. It means that you have to put the wheels very close to at least 1 of your flight case’s sides (in my case this is the long one), so the braking mechanism can swivel far enough from under the case and nobody can easily put the brakes on or off with their feet. (Roadies often wear safety shoes and put on the brake with the steel tip on those.) Obviously you put on the unbraked swivel castors symmetrically. We already discussed the two last factors earlier.
Our web shop has this useful mounting kit for 4 wheels, especially for fixing wheels and wheel panels:
- 8 bolts (M8) of 20 mm long
- 8 bolts (M8) of 30 mm long
- 16 M8 teenuts
- 16 washers
Why are we using bolts of 2 different lengths? Because we usually fix each castor with two bolts through the wheel panel and two bolts through the flight case bottom and the wheel panel. The short bolts we usually put furthest to the outside, the long ones furthest to the inside. With this method you can even fix the wheels very close to the edge, without also having to drill through the aluminium case angles, as the bolts to the outside only need to go through the wheel panel anyway.
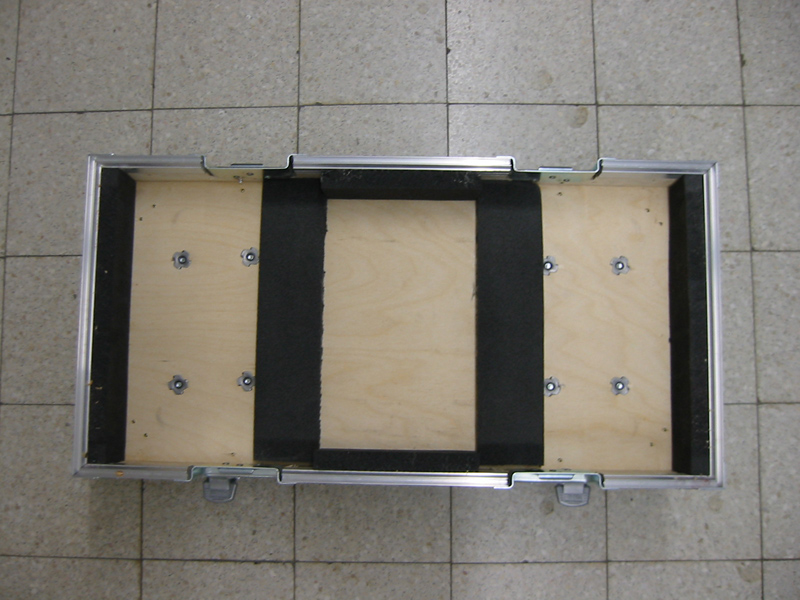
We prefer working with teenuts because they stick out less on the inside of the flight case. In the end you’re going to have 8 teenuts on the inside of your case (on the long bolts) and 8 on the ‘top’ of the wheel panels (on the short bolts), which will be invisible, because they’re wedged between the bottom of your flight case and the top of the wheel panel.
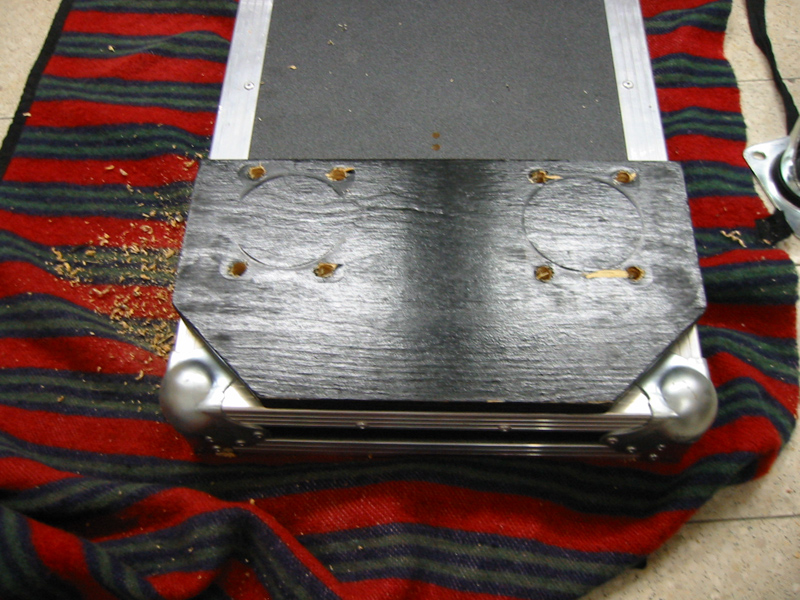

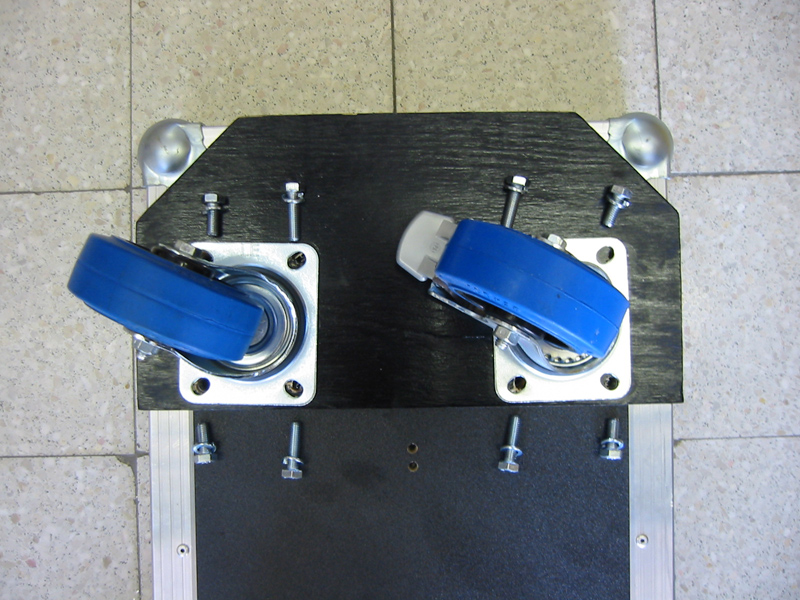
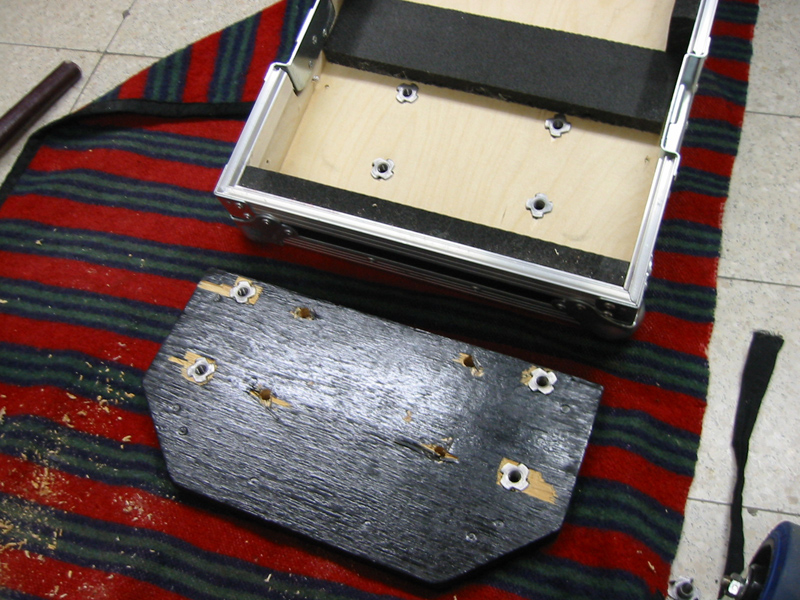
This is a good time for a practical example. First I drill the holes I need in the wheel panel. I don’t drill all of these through the wood of the flight case too. You can see this in the two photos above.
I’m going to stick the long (3 cm) bolts through the holes I also drilled through the flight case and fix these with teenuts on the case’s inside. I’m going to stick the short (2 cm) bolts through the holes I drilled only through the wheel panel and fix these with the teenuts between the flight case and the wheel panel. For the rest you can see in the photos here that I used my trick with the washers again (as I explained in Tips for teenuts) to draw the teenuts nicely into the wood.
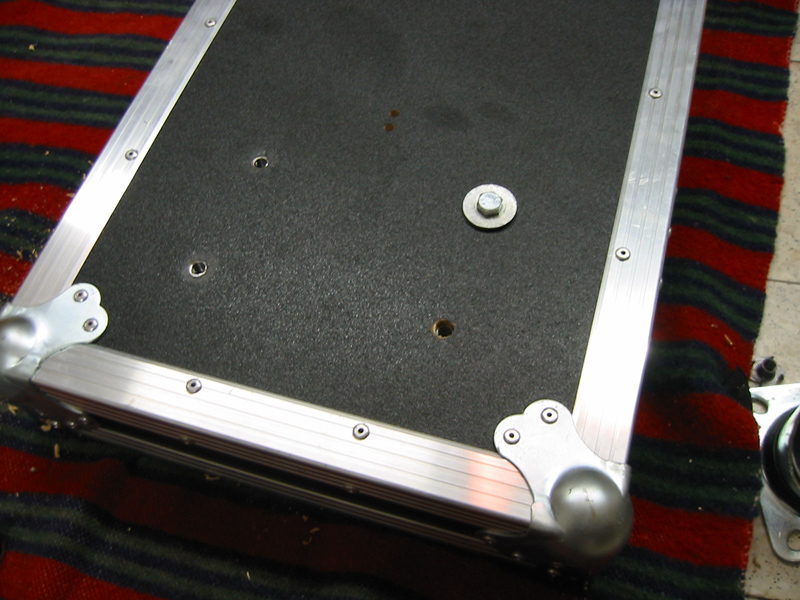
The photo on the left below shows the short and long bolts. You can also see, by the way, that it would have been perfectly possible to fit the left castor in the photo even further to the left and the right one even further to the right. Though this would have meant that the fixing holes furthest right and furthest left would have ended up right under the case angle, but as I would have used short bolts there anyway, I wouldn’t have needed to drill through there. So that would stay unblemished at any rate.
Good luck!